AS PROMISED : Isla's First Four Months
I am not procrastinating or anything, I've been really busy these past few days. First, I'm helping my husband in making some finishing touches to the wedding photos and album that he will be giving to his client this month. Second, in relation to my previous post, I have decided to bake cakes for the holiday season and I have started with my first order as well as ordering cakes boxes, boards, etc. I have also been doing some holiday (online) shopping on the side. I really cannot bear seeing the bottom of our Christmas tree so empty so I have also wrapped some gifts (a bit late I have to say) but it's still not that many as we have not yet finished getting gifts for family and friends.

I first got this idea from Instagram through Filipina actress Ara Mina's account who has a cake business. She makes the cakes herself. I didn't know that this has been going on and originally, you use either KitKat or Twix but when I tried the KitKat chocolate sticks, they were too high for my cake and it would look like a well. Haha. And I think we only have 1 size of KitKats here, I know other countries (including the Philippines) have smaller ones. So I had no choice but to eat those KitKats for weeks (as it was such a burden munching on them lol). What I used instead is Bonne Maman's Breton Milk Cbocolate Crepes (Crepes dentelle chocolat au lait - this is in front of the box and translations are only at the sides). You need two of these.

So I just used my usual moist chocolate cake recipe and chocolate ganache. You actually spend more time decorating especially with the M & M's. I mean you just randomly pour the M & M's but I wanted to make it look like a pattern (and give myself more work), making sure that the same colors aren't together and they are in order (from what I learned in grade school) which is red, yellow, blue, green, brown and orange (that's just the available M & M colors). Oh, the OC part of me is alarming! Anyway, one sharing bag of M & M's wasn't enough so I had one circle in all red and I had to continue the next day as I had to buy more M & M's. I have learned that there the M & M's aren't equally distributed per color. That's some piece of geek/OC trivia.
NB. Make sure you do the tedious task of putting the M & M's first before the chocolate barrels surrounding the cake. Unless, you plan to just pour the M & M's. And maybe next time, I can try Peanut M & M's because they're bigger and maybe (less) tedious.

By the third month, I continued the tradition of Halloween by making carrot cupcakes just like last year but instead of adding pineapples, I used grated squash just to try after seeing this on Jamie Oliver's Instagram. It was just the same, you won't actually notice there's squash in them. I also tried apple with carrots last time and it also turned out great (given that apples work well with the cinnamon in the carrot cake recipe).
With the frosting, it's the same cream cheese frosting included in the recipe I linked above. I just added some cupcake toppers I got from Sainsbury's to complete the Halloween theme as well as the cardboard cupcake stand from Poundland.
I had previous cases of failed cream cheese frostings and they ended up runny. Although they may harden in the fridge after I have iced the cake, I am still not satisfied. But I'm glad I finally discovered the secret for the right consistency. Here's a quick rundown as well as some tips to save a runny frosting and still use it.
Cream Cheese Frosting
1 200g Philadelphia cream cheese
1/2 c butter (or in my case, I don't measure anymore, I just use 1:2 ratio for butter : cream cheese and it always works)
1 cup icing sugar
Put all ingredients in a bowl then beat using a hand or stand-in electric mixer until soft peaks form. The peaks should stand on their own.
Frosting tips:

I am posting this delayed bakes before Isla turns 5 months. I originally planned to post every 3 months as we have been celebrating Isla's monthly birthdays but ended up with 4 months instead. As I don't want to make it a further 5 months, here I am now. I tried to be creative as much as possible and make every month different by making variations of my previous or experimenting with new recipes.

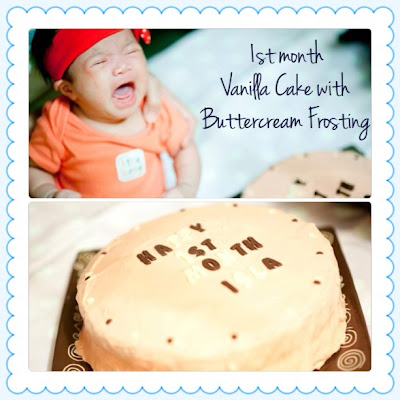
Obviously Isla wasn't that happy on her first month picture (hehe), those were the days when we have been struggling and she has been crying a lot. But now it's a lot calmer, manageable and we're more settled. Just imagine what I have to go through just to make this cake. I had to juggle between taking care of her (when my hubby runs out of his patience) and baking in the kitchen. I was able to manage to make a decent cake. I used the same recipe for my Vanilla Cupcakes but only added more ingredients. As explained in my blog about this, the original recipe called for a 3-tier cake so I tried to do my math (to the best that I can) and only used 1/3 of the ingredients which is good for 12 cupcakes. Since I made a two layer cake (with frosting in between), I doubled the ingredients from my 1/3 calculations. Sounds logical? I hope I didn't confuse you more.
About the frosting, I used plain buttercream plus red food coloring. Yes, I attempted to make it red, to match with Isla's headband but I used up all the red food coloring and only ended up with orange. Well at least she was wearing a shade of orange (phew!). I also don't have an exact recipe for buttercream here in my blog, but you can check out this link for my chocolate cake and just remove the mocha/chocolate bit.

I first got this idea from Instagram through Filipina actress Ara Mina's account who has a cake business. She makes the cakes herself. I didn't know that this has been going on and originally, you use either KitKat or Twix but when I tried the KitKat chocolate sticks, they were too high for my cake and it would look like a well. Haha. And I think we only have 1 size of KitKats here, I know other countries (including the Philippines) have smaller ones. So I had no choice but to eat those KitKats for weeks (as it was such a burden munching on them lol). What I used instead is Bonne Maman's Breton Milk Cbocolate Crepes (Crepes dentelle chocolat au lait - this is in front of the box and translations are only at the sides). You need two of these.

So I just used my usual moist chocolate cake recipe and chocolate ganache. You actually spend more time decorating especially with the M & M's. I mean you just randomly pour the M & M's but I wanted to make it look like a pattern (and give myself more work), making sure that the same colors aren't together and they are in order (from what I learned in grade school) which is red, yellow, blue, green, brown and orange (that's just the available M & M colors). Oh, the OC part of me is alarming! Anyway, one sharing bag of M & M's wasn't enough so I had one circle in all red and I had to continue the next day as I had to buy more M & M's. I have learned that there the M & M's aren't equally distributed per color. That's some piece of geek/OC trivia.
NB. Make sure you do the tedious task of putting the M & M's first before the chocolate barrels surrounding the cake. Unless, you plan to just pour the M & M's. And maybe next time, I can try Peanut M & M's because they're bigger and maybe (less) tedious.

By the third month, I continued the tradition of Halloween by making carrot cupcakes just like last year but instead of adding pineapples, I used grated squash just to try after seeing this on Jamie Oliver's Instagram. It was just the same, you won't actually notice there's squash in them. I also tried apple with carrots last time and it also turned out great (given that apples work well with the cinnamon in the carrot cake recipe).
With the frosting, it's the same cream cheese frosting included in the recipe I linked above. I just added some cupcake toppers I got from Sainsbury's to complete the Halloween theme as well as the cardboard cupcake stand from Poundland.
I had previous cases of failed cream cheese frostings and they ended up runny. Although they may harden in the fridge after I have iced the cake, I am still not satisfied. But I'm glad I finally discovered the secret for the right consistency. Here's a quick rundown as well as some tips to save a runny frosting and still use it.
Cream Cheese Frosting
1 200g Philadelphia cream cheese
1/2 c butter (or in my case, I don't measure anymore, I just use 1:2 ratio for butter : cream cheese and it always works)
1 cup icing sugar
Put all ingredients in a bowl then beat using a hand or stand-in electric mixer until soft peaks form. The peaks should stand on their own.
Frosting tips:
- The recipe is enough to ice one carrot or red velvet cake including the filling.
- In case your frosting is too runny, don't fret, you can still use it. Add a few dollops of double cream to the rescue and then whip it again using an electric mixer. And viola, you've got yourself a frosting. Just make sure that you always have a double cream handy. There are long life double cream brands available if you're concerned about expiration dates. Tesco has one and I've always used that in my cakes and frostings.
- The double cream trick also works with buttercream frosting and I've used in the first cake above.
- If you're still not confident, you can be straightforward and use double cream frosting which is of course double cream (usually 1 cup) and about 3 tablespoons of icing sugar. It will never go runny and it'll be the right consistency after a few minutes of beating in a hand or stand-in mixer. Another good thing about this is you are only using less icing sugar compared to the other two frostings.

This is the most complicated of the four. Firstly, because the butter cupcakes is sort of a tedious recipe on it's own and second, making the cupcakes look like cookie monster is some serious decorating. I used the same buttercream recipe (link above) and just added blue food coloring. This is still something I have to learn about food colorings. In the bottle, it says on the instructions to not use use more than 1 tablespoon but sometimes you may need more in order to give you the desired color. Maybe I'll try to use butter in the form of bars instead of the spreadable ones and we'll see if I only need to stick with the 1 tablespoon or less for the food coloring. It's just a bit frustrating that no matter how much more you add, it won't be blue enough to be a cookie monster. Mine turned out blue-green instead of blue. Or maybe I need to change the brand of food coloring (hmmm).
The instructions on how to decorate cookie monster cupcakes are in this video. This is the less complicated, straightforward and simple way of making them. And you don't need to use a specialised icing tip. Just watch the video to see what I mean. So aside from the blue buttercream frosting, you need the following:
Small chocolate chip cookies (I used Maryland, they have the small snack packs)
Milkybar White Chocolate buttons & chocolate chips for the eyes
Icing bag
barbecue stick to bore holes on your icing bag for the cookie monster effect
For the butter cupcakes, I used this recipe which was shown on Kris TV (yes, the Filipino talk show). I just halved the ingredients and I was able to yield 24 cupcakes. Unfortunately, I made the cupcakes a day before so me and hubby can't stop munching on them because the cupcakes were so good on their own which explains the few cupcakes on the stand. It actually turned out to be a good thing because the buttercream frosting I made was only enough for the available cupcakes and of course, because the difficulty level in decorating the cupcakes is the same as the M & M's cake. Lol.


Comments
Post a Comment